
There’s something genuinely exciting about opening a brand-new model kit for the first time. The neatly packed sprues, the crisp instruction booklet, the smell of fresh plastic it’s the beginning of something you built with your own hands.
But if you’ve never done it before, that excitement can quickly turn into confusion. Where do I even start? What tools do I need? What if I mess it up?
These are completely normal feelings, and the good news is model kit assembly is far more beginner-friendly than it looks. With the right guidance and a little patience, anyone can build a stunning scale model from scratch. At Plateau RC & Hobby, we help beginners and seasoned hobbyists alike find the right kits, tools, and know-how to make every build a success. Let’s walk you through everything you need to know.
What Is a Model Kit? (Beginner Overview)
A model kit is a set of pre-molded plastic (or resin) parts that you assemble into a miniature replica of a vehicle, aircraft, ship, figure, or structure. They come in different scale sizes like 1:72, 1:48, or 1:35 which refers to how small the model is compared to the real thing.
Model kits are grouped by difficulty:
- Snap-fit kits No glue needed. Great for absolute beginners.
- Standard plastic kits Require cement glue and basic tools. Most popular for hobbyists.
- Detail/resin kits For advanced builders looking for hyper-realistic results.
If you’re just starting out, snap-fit or entry-level plastic kits are the perfect place to begin your model building journey.
Essential Tools You Need to Get Started
You don’t need a full workshop to build your first model. Here’s what the basic toolkit looks like:
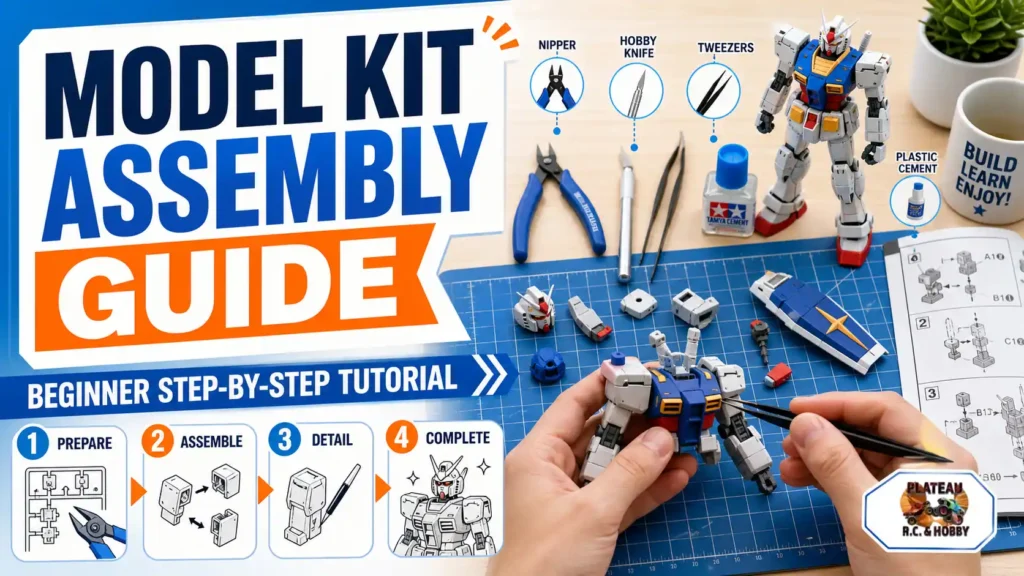
- Hobby knife (X-Acto knife) For precise cutting and trimming
- Plastic sprue cutters (nippers) Safely removes parts from the frame
- Model cement (plastic glue) Bonds parts together cleanly
- Sandpaper (400–800 grit) Smooths rough edges and seams
- Tweezers Essential for handling tiny parts
- Cutting mat Protects your work surface
- Paint & brushes (optional) Adds color and realism to your finished build
You can find starter tool kits at Plateau RC & Hobby that include everything a beginner needs in one convenient bundle no guesswork required.
Understanding Your Model Kit Instructions
Before you touch a single part, read the instruction manual. It sounds obvious, but many beginners skip straight to building and that’s where problems begin.
Model kit manuals are organized in numbered steps with diagrams showing exactly which parts connect where. Each part is labeled with a letter and number (like A12 or C4) that matches the sprue frame.
Key habits to build early:
- Read two or three steps ahead before acting
- Identify all parts for a step before starting it
- Dry fit (test without glue) before committing to any bond
Dry fitting is one of the most valuable habits in model kit assembly. It lets you catch alignment issues before glue makes things permanent.
Step-by-Step Model Kit Assembly Process
Step 1:- Prepare Your Workspace
Set up a clean, well-lit area with enough room to lay out your parts. Good lighting prevents mistakes. A clutter-free surface keeps small parts from disappearing.
Step 2 – Remove and Clean Parts
Use your sprue cutters to remove parts from the frame never pull or snap them off by hand. Leave a tiny bit of the gate (the connecting nub) and trim it cleanly with your hobby knife afterward. This prevents stress marks on the plastic.
Step 3 – Dry Fit Components
Before applying any glue, test how parts fit together. Press them together gently by hand. If something feels off, now is the time to troubleshoot not after the glue dries.
Step 4 – Apply Glue Properly
Less is more with model cement. Apply a small amount to one surface, press the parts together firmly for 15–30 seconds, and hold still. Plastic cement works by slightly melting the plastic, creating a molecular bond so over-applying causes ugly melt marks.
Step 5 – Assemble Sections Gradually
Don’t try to build everything in one go. Work in logical sections fuselage before wings, hull before deck, body before wheels. Let each section cure before moving to the next.
Step 6 – Sand and Smooth Edges
Once glue is fully dry, use sandpaper to smooth any visible seams or rough spots. Start with coarser grit (400) and finish with finer grit (800) for a clean, professional surface.
Step 7 – Painting and Finishing Touches
Painting is optional, but it’s what takes a model from “assembled” to impressive. Use acrylic model paints for beginners they’re water-soluble, dry quickly, and easy to work with. Apply thin coats, let each layer dry, and build up color gradually.
Common Mistakes First-Timers Should Avoid
Even small slip-ups can affect your final result. Here are the most common beginner mistakes and how to skip them:
- Using too much glue Causes overflow, smearing, and surface damage
- Skipping the instructions Leads to parts assembled in the wrong order
- Rushing the build Joints that aren’t fully cured will come apart later
- Not organizing parts Losing tiny pieces mid-build is incredibly frustrating
- Cutting too close to the part Leaves stress marks or nicks on visible surfaces
Take your time. Model building is a hobby, not a race.
Beginner Tips for Better Results
- Start simple A 50-part snap-fit kit teaches you far more than forcing yourself through a 300-part expert kit
- Keep your workspace organized Sort parts by letter/number before you begin
- Watch build videos YouTube has thousands of tutorials for nearly every kit
- Practice makes perfect Your second build will be noticeably better than your first
- Enjoy the process The journey is just as rewarding as the finished model
Best Model Kits for Beginners
Not all kits are created equal. For first-timers, these categories work best:
- 1:72 scale aircraft Fewer parts, widely available, satisfying results
- Snap-together car models No glue needed, beginner-friendly
- Military vehicle kits (1:35 scale) Great detail without overwhelming complexity
- Gundam/mecha snap kits Hugely popular and very beginner-accessible
At Plateau RC & Hobby, our team personally curates beginner-friendly kits that are fun to build and easy to finish. Whether you’re into WWII aircraft, modern tanks, or Japanese mecha, we’ve got something that’s right for your skill level and interests. Explore beginner kits at Plateau RC & Hobby and find your perfect first build.
Why Choose Plateau RC & Hobby?
We’re not just a hobby shop we’re a resource for builders at every level.
Here’s what sets us apart:
- Deep hobby expertise Our staff are active hobbyists who understand the craft firsthand
- Curated product range From entry-level snap kits to advanced detail sets, we stock what builders actually need
- Beginner-friendly guidance We’re happy to help you choose the right kit, tools, and paints for your first project
- Trusted local source When you search for a “hobby shop near me,” Plateau RC & Hobby is the name that delivers real value, not just products
Whether you visit us in-store or browse online, we’re here to make your model building experience the best it can be.
Conclusion
Model kit assembly is one of the most rewarding hobbies you can pick up. It sharpens your focus, builds patience, and gives you a tangible, hand-built result you can display with pride. And the best part? You don’t need to be an expert to get started.
Follow this guide step by step, use the right tools, and don’t be afraid to go slow. Every master builder started exactly where you are right now.
Start your model building journey today visit Plateau RC & Hobby for beginner-friendly model kits, expert advice, and everything you need to bring your first build to life.

 ICONIER Digital Agency